Legrand NOC01US - Bedienungsanleitung - Seite 46


Inhalt:
- Seite 4 – Schlitzschraubendreher.; Benodigd gereedschap
- Seite 6 – Guided installation video available at:; Pour un fonctionnement optimal,
- Seite 8 – OK; Pick a spot on the wall to install; Check with your smartphone that you have; Wählen Sie eine Stelle , um die Smarte Außenkamera an der
- Seite 10 – Schalten Sie den Strom der Sicherung oder Schutzschalter ab,
- Seite 12 – Prepare the installation.; Bereiten Sie die Installation vor.
- Seite 14 – tion box. Make sure that the UP sign is at; Sécurisez la plaque de fixation à la boîte de jonction.; Secure the mounting strap
- Seite 16 – Drill two holes above and to the left of the; Fijar la tira de montaje a la pared.
- Seite 18 – Hang the camera with the wire tie.; Carefully hang the camera with the wire tie from; Suspendez la caméra à l'aide de la sangle.
- Seite 20 – Conectar los cables.
- Seite 22 – Align the central holes of the wall plate with those; Sécurisez le boîtier mural sur la plaque de fixation.
- Seite 24 – Secure the camera; Use the provided mounting holder and black; Fijar la cámara a la placa.
- Seite 26 – Neigen Sie die Kamera, um das Video aus dem richtigen; Inclina la cámara para grabar vídeos desde el ángulo correcto.; Inclinez correctement la caméra pour filmer la zone à; Use the Allen key (D) to untighten the screws
- Seite 28 – The Smart Outdoor Camera will start for the first
- Seite 30 – Schützen Sie die Verdrahtung.
48
EN
FR
DE
IMPORTANT: Safety information
Class I electrical appliance: use only on 100-240 V AC 50-60Hz.
Risk of electric shock or fire. A good knowledge of electrical
systems is required. If not qualified, do not attempt to install. Contact
a qualified electrician.
Disconnect power at fuse or circuit breaker before installing
or servicing.
No user serviceable parts inside. To avoid electrical shock,
do not disassemble the product.
To prevent wiring damage or abrasion, do not expose wiring
to sharp objects such as edges of metal sheet.
Assistance may be required to support the product during
installation.
Handle the product with care during the installation. Sharp edges
could hurt you or damage the walls. The front glass could break
if hit. Broken glass should be replaced.
Keep a minimum distance of 1 meter (3.3 feet) between the light and
your eyes or any surface in front.
IMPORTANT : Informations de sécurité
Appareil électrique de classe 1 : Supporte uniquement 100-240 V
AC 50-60Hz.
Risque de choc électrique ou d'incendie. Une bonne connaissance
des systèmes électriques est nécessaire. Si vous n'êtes pas qualifié,
n'essayez pas d'installer l'appareil. Contactez un électricien qualifié.
Coupez le courant électrique au fusible ou au disjoncteur général
avant l'installation ou l'entretien.
Aucune pièce réparable par l'utilisateur. Pour éviter un choc
électrique, ne démontez pas le produit.
Pour éviter l'endommagement du câblage ou l'abrasion, n'exposez
pas le câblage à des objets tranchants tels que les bords d'une tôle.
De l'aide peut être nécessaire lors de l'installation.
Manipulez le produit avec précaution lors de l'installation. Les arêtes
vives pourraient vous blesser ou endommager les murs. La vitre
avant pourrait se briser en cas de choc. Le verre brisé doit être
remplacé.
Gardez une distance minimale de 1 mètre entre la lumière et vos
yeux ou toute autre surface.
ACHTUNG: Sicherheitsinformation
Klasse I Elektrogerät: nur verwenden bei 100-240 V AC 50-60Hz.
Risiko eines elektrischen Schlags oder Feuer. Es ist eine gute
Kenntnis der elektrischen Anlagen erforderlich. Wenn Sie nicht
qualifiziert sind, versuchen Sie nicht es zu installieren. Kontaktieren
Sie einen qualifizierten Elektriker.
Schalten Sie den Strom der Sicherung oder Schutzschalter vor der
Installation oder Wartung aus.
Keine zu wartenden Teile im Inneren. Zur Vermeidung eines
Stromschlags, zerlegen Sie das Produkt nicht.
Um Kabelschäden oder Abrieb zu verhindern, die Verdrahtung nicht
scharfen Gegenständen wie Blechkanten aussetzen.
Es kann sein, dass Hilfe während der Installation erforderlich ist.
Behandeln Sie das Produkt während der Installation sorgfältig.
Scharfe Kanten können Ihnen Schaden zufügen oder die Wände
beschädigen. Das Frontglas könnte brechen, wenn es getroffen
wird. Gebrochenes Glas sollte ausgetauscht werden.
Halten Sie mindestens 1 Meter Abstand (3,3 Fuß) zwischen dem
Licht und Ihren Augen oder zu jeder Fläche auf der Vorderseite.
„Anleitung wird geladen“ bedeutet, dass Sie warten müssen, bis die Datei vollständig geladen ist und Sie sie online lesen können. Einige Anleitungen sind sehr groß, und die Zeit, bis sie angezeigt wird, hängt von Ihrer Internetgeschwindigkeit ab.
Zusammenfassung
4 NL IT ES DE FR EN Required Tools (not included): - Phillips and slotted screwdrivers. - Step ladder. - Drill - Ø6mm (only required if there is no junction box where the product is installed). - Caulking gun and Silicone sealant (recommended tool). - Level (recommended tool). Herramientas neces...
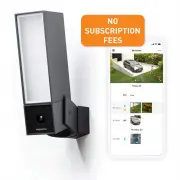
6 For optimal performance install the Smart Outdoor Camera at a height between 2.5 and 4 meters (8 and 14 ft.) with a tilt angle of around 30°. Guided installation video available at: https://www.netatmo.com/outdoor-cam-setup Read carefully the safety information on page 48 before proceeding to the ...
8 OK Pick a spot on the wall to install the Smart Outdoor Camera. Check with your smartphone that you have Wi-Fi reception at the spot you chose.If you do not, try to move your Wi-Fi router closer. Wählen Sie eine Stelle , um die Smarte Außenkamera an der Wand zu installieren. Überprüfen Sie mit Ihr...
Weitere Modelle Sicherheitskameras Legrand
-
 Legrand NOCSUS
-
 Legrand NSC01US