Legrand NOC01US - Bedienungsanleitung - Seite 41


Inhalt:
- Seite 4 – Schlitzschraubendreher.; Benodigd gereedschap
- Seite 6 – Guided installation video available at:; Pour un fonctionnement optimal,
- Seite 8 – OK; Pick a spot on the wall to install; Check with your smartphone that you have; Wählen Sie eine Stelle , um die Smarte Außenkamera an der
- Seite 10 – Schalten Sie den Strom der Sicherung oder Schutzschalter ab,
- Seite 12 – Prepare the installation.; Bereiten Sie die Installation vor.
- Seite 14 – tion box. Make sure that the UP sign is at; Sécurisez la plaque de fixation à la boîte de jonction.; Secure the mounting strap
- Seite 16 – Drill two holes above and to the left of the; Fijar la tira de montaje a la pared.
- Seite 18 – Hang the camera with the wire tie.; Carefully hang the camera with the wire tie from; Suspendez la caméra à l'aide de la sangle.
- Seite 20 – Conectar los cables.
- Seite 22 – Align the central holes of the wall plate with those; Sécurisez le boîtier mural sur la plaque de fixation.
- Seite 24 – Secure the camera; Use the provided mounting holder and black; Fijar la cámara a la placa.
- Seite 26 – Neigen Sie die Kamera, um das Video aus dem richtigen; Inclina la cámara para grabar vídeos desde el ángulo correcto.; Inclinez correctement la caméra pour filmer la zone à; Use the Allen key (D) to untighten the screws
- Seite 28 – The Smart Outdoor Camera will start for the first
- Seite 30 – Schützen Sie die Verdrahtung.
42
Résolution des problèmes d'installation
Pour plus de conseils d'aide, consultez la section FAQ sur
l'application ou rendez-vous sur http://support.netatmo.com.
Vous avez besoin de remplacer la carte microSD ? Rendez-vous
sur : https://www.netatmo.com/change-sd-card.
Installation troubleshooting.
For further help please check the FAQ section on the app
or go to http://support.netatmo.com.
Need to replace the microSD card? Learn more about it at:
https://www.netatmo.com/change-sd-card.
EN
FR
!
!
Floodlight does not
turn on (the Smart
Outdoor Camera
does not start).
Fuse is blown
or circuit breaker
is turned off.
Switch that controls
old light fixture is off.
Incorrect circuit
wiring.
Possible causes
Problem
Solutions
Replace the fuse
or turn circuit
breaker on.
Turn old switch on and
keep it on at all times.
Your Camera needs
to be permanently
powered.
Check wire
connections. Shut
off the power first.
(Go back to step 5).
Check wire
connections. Shut
off the power first.
(Go back to step 5).
Fuse blows
or circuit breaker
trips when light
is turned on.
Crossed wires
or power wire
is grounding out.
!
!
La lumière ne
s'allume pas (la
Caméra Extérieure
Intelligente ne
démarre pas).
Le fusible a sauté
ou le disjoncteur est
coupé.
L'interrupteur qui
contrôle l'ancien
appareil d'éclairage
est en position
éteinte.
Mauvais câblage
du circuit.
Causes possibles
Problème
Solutions
Remplacez le fusible
ou rétablissez le
disjoncteur.
Basculez l'interrupteur
et laissez-le en position
allumée. Votre Caméra
doit être alimentée en
permanence.
Vérifiez les
branchements.
Coupez d'abord le
courant. (Retournez
à l'étape 5)
Vérifiez les
branchements.
Coupez d'abord le
courant. (Retournez
à l'étape 5).
Le fusible a sauté
ou le disjoncteur
est coupé.
Fils croisés ou fil
d'alimentation en
contact avec la terre.
„Anleitung wird geladen“ bedeutet, dass Sie warten müssen, bis die Datei vollständig geladen ist und Sie sie online lesen können. Einige Anleitungen sind sehr groß, und die Zeit, bis sie angezeigt wird, hängt von Ihrer Internetgeschwindigkeit ab.
Zusammenfassung
4 NL IT ES DE FR EN Required Tools (not included): - Phillips and slotted screwdrivers. - Step ladder. - Drill - Ø6mm (only required if there is no junction box where the product is installed). - Caulking gun and Silicone sealant (recommended tool). - Level (recommended tool). Herramientas neces...
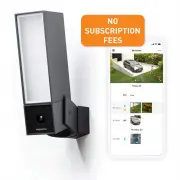
6 For optimal performance install the Smart Outdoor Camera at a height between 2.5 and 4 meters (8 and 14 ft.) with a tilt angle of around 30°. Guided installation video available at: https://www.netatmo.com/outdoor-cam-setup Read carefully the safety information on page 48 before proceeding to the ...
8 OK Pick a spot on the wall to install the Smart Outdoor Camera. Check with your smartphone that you have Wi-Fi reception at the spot you chose.If you do not, try to move your Wi-Fi router closer. Wählen Sie eine Stelle , um die Smarte Außenkamera an der Wand zu installieren. Überprüfen Sie mit Ihr...
Weitere Modelle Sicherheitskameras Legrand
-
 Legrand NOCSUS
-
 Legrand NSC01US