Legrand NOC01US - Bedienungsanleitung - Seite 13


Inhalt:
- Seite 4 – Schlitzschraubendreher.; Benodigd gereedschap
- Seite 6 – Guided installation video available at:; Pour un fonctionnement optimal,
- Seite 8 – OK; Pick a spot on the wall to install; Check with your smartphone that you have; Wählen Sie eine Stelle , um die Smarte Außenkamera an der
- Seite 10 – Schalten Sie den Strom der Sicherung oder Schutzschalter ab,
- Seite 12 – Prepare the installation.; Bereiten Sie die Installation vor.
- Seite 14 – tion box. Make sure that the UP sign is at; Sécurisez la plaque de fixation à la boîte de jonction.; Secure the mounting strap
- Seite 16 – Drill two holes above and to the left of the; Fijar la tira de montaje a la pared.
- Seite 18 – Hang the camera with the wire tie.; Carefully hang the camera with the wire tie from; Suspendez la caméra à l'aide de la sangle.
- Seite 20 – Conectar los cables.
- Seite 22 – Align the central holes of the wall plate with those; Sécurisez le boîtier mural sur la plaque de fixation.
- Seite 24 – Secure the camera; Use the provided mounting holder and black; Fijar la cámara a la placa.
- Seite 26 – Neigen Sie die Kamera, um das Video aus dem richtigen; Inclina la cámara para grabar vídeos desde el ángulo correcto.; Inclinez correctement la caméra pour filmer la zone à; Use the Allen key (D) to untighten the screws
- Seite 28 – The Smart Outdoor Camera will start for the first
- Seite 30 – Schützen Sie die Verdrahtung.
13
RU
IT
CN
Preparare l'installazione.
Nel caso in cui si voglia sostituire un faretto esistente,
smontarne la struttura di supporto.
Nel caso in cui il punto prescelto corrisponda al punto in cui è
collocata una scatola di derivazione, andare al passo (3A).
Se non c'è nessuna scatola di derivazione o se viene utilizzato
un nuovo cavo dell'elettricità per alimentare la Videocamera,
andare al passo (3B).
Prepare a instalação.
Se estiver substituindo uma luminária antiga, desmonte a
luminária. Se houver uma caixa de junção atrás dela, vá para a
etapa (3A). Se não houver uma caixa de junção atrás dela ou
se passou um novo fio para alimentar a sua câmara, vá para a
etapa (3B) .
Подготовьтесь к установке.
При установке камеры на место старого светильника разберите
его.
Если за светильником имеется распределительная коробка,
перейдите к шагу (3A).
Если распределительной коробки нет, или если вы провели
новый провод для питания Камеры, перейдите к шагу (3B).
準備安裝。
替換舊燈具時,請先拆掉舊燈具。
如舊燈具後面有接線盒,請前往步驟(3A)。
如舊燈具後面沒有接線盒,或者需要在攝像頭中接入新的電
線,請前往步驟(3B)。
Bereid de installatie voor.
Indien u een oude lamp moet vervangen, dan demonteert u
deze lamp eerst.
Indien zich hierachter een aansluitdoos bevindt, gaat u naar
stap (3A).
Indien zich hierachter geen aansluitdoos bevindt of indien u
een nieuwe draad naar uw Camera leidt, gaat u naar stap (3B).
准备安装。
替换旧灯具时,请先拆掉旧灯具。
如旧灯具后面有接线盒,请前往步骤(3A)。
如旧灯具后面没有接线盒,或者需要在摄像头中接入新的电
线,请前往步骤(3B)。
取り付け準備。
古い照明器具と交換する場合は、照明取付具を分解してください。
背後にジャンクションボックスがある場合は、ステップ (3A)に進んで
ください。
背後にジャンクションボックスがない場合またはカメラに電力を供給
するために、新しい電線を配線する場合は、ステップ(3B)に進んでく
ださい。
NL
TW
PT
JP
„Anleitung wird geladen“ bedeutet, dass Sie warten müssen, bis die Datei vollständig geladen ist und Sie sie online lesen können. Einige Anleitungen sind sehr groß, und die Zeit, bis sie angezeigt wird, hängt von Ihrer Internetgeschwindigkeit ab.
Zusammenfassung
4 NL IT ES DE FR EN Required Tools (not included): - Phillips and slotted screwdrivers. - Step ladder. - Drill - Ø6mm (only required if there is no junction box where the product is installed). - Caulking gun and Silicone sealant (recommended tool). - Level (recommended tool). Herramientas neces...
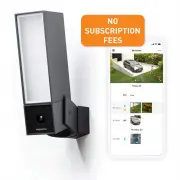
6 For optimal performance install the Smart Outdoor Camera at a height between 2.5 and 4 meters (8 and 14 ft.) with a tilt angle of around 30°. Guided installation video available at: https://www.netatmo.com/outdoor-cam-setup Read carefully the safety information on page 48 before proceeding to the ...
8 OK Pick a spot on the wall to install the Smart Outdoor Camera. Check with your smartphone that you have Wi-Fi reception at the spot you chose.If you do not, try to move your Wi-Fi router closer. Wählen Sie eine Stelle , um die Smarte Außenkamera an der Wand zu installieren. Überprüfen Sie mit Ihr...
Weitere Modelle Sicherheitskameras Legrand
-
 Legrand NOCSUS
-
 Legrand NSC01US