Gessi 37064W - Bedienungsanleitung - Seite 6


Inhalt:
- Seite 3 – Prima dell’installazione e messa in Funzione; DATI TECNICI; BeFore installation and setting to work; TECHNICAL DATA; avant l’installation et la mise en Fonction; DONNÉES TECHNIQUES; vor der installation und inBetrieBnahme; TECHNISCHE DATEN
- Seite 4 – OK
- Seite 9 – Dann schließt man die Schläuche an das Versorgungsnetz an.; instalación; de fijación es posible no utilizar la brida triangular de plástico.
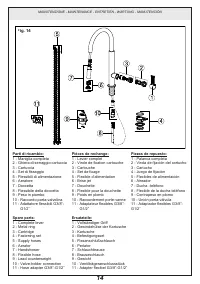
- Seite 13 – sostituzione della cartuccia; e che le guarnizioni siano correttamente posizionate.; cartridge rePlacement; the body of the mixer.; suBstitution de la cartouche; en su asiento (X) y que las juntas estén posicionadas correctamente.
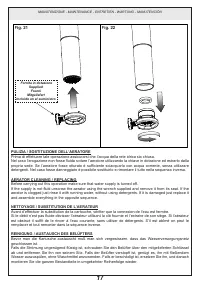
- Seite 14 – and assemble everything in the opposite sequence.; nettoyage / suBstitution de l’aerateur; remplacer et tout remonter dans la séquence inverse.; reinigung / austausch des BelÜFters; Fornita in dotazione
8
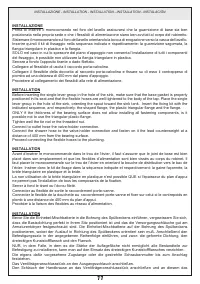
PRELIMINARI - PRE-INSTALLATION INFORMATION - PRÉALABLES - VORBEREITUNG - PRELIMINARES
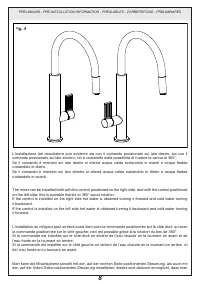
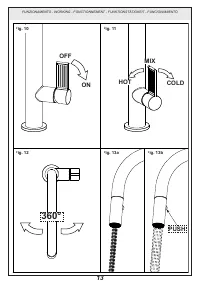
L’installazione del miscelatore può avvenire sia con il comando posizionato sul lato destro, sia con il
comando posizionato sul lato sinistro; ciò è consentito dalla possibilità di ruotare la canna di 360°.
Se il comando è montato sul lato destro si otterrà acqua calda ruotandolo in avanti e acqua fredda
ruotandolo in dietro.
Se il comando è montato sul lato sinistro si otterrà acqua calda ruotandolo in dietro e acqua fredda
ruotandolo in avanti.
The mixer can be installed both with the control positioned on the right side, and with the control positioned
on the left side; this is possible thanks to 360° spout rotation.
If the control is installed on the right side hot water is obtained turning it forward and cold water turning
it backward.
If the control is installed on the left side hot water is obtained turning it backward and cold water turning
it forward.
L’installation du mitigeur peut se faire aussi bien avec la commande positionnée sur le côté droit, qu’avec
la commande positionnée sur le côté gauche; ceci est possible grâce à la rotation du bec de 360°.
Si la commande est installée sur le côté droit on obtient de l’eau chaude en la tournant en avant et de
l’eau froide en la tournant en arrière.
Si la commande est installée sur le côté gauche on obtient de l’eau chaude en la tournant en arrière et
de l’eau froide en la tournant en avant.
Man kann die Mischbatterie sowohl mit der, auf der rechten Seite positionierten Steuerung, als auch mit
der, auf der linken Seite positionierten Steuerung installieren; dieses wird dadurch ermöglicht, dass man
Fig. 4
„Anleitung wird geladen“ bedeutet, dass Sie warten müssen, bis die Datei vollständig geladen ist und Sie sie online lesen können. Einige Anleitungen sind sehr groß, und die Zeit, bis sie angezeigt wird, hängt von Ihrer Internetgeschwindigkeit ab.
Zusammenfassung
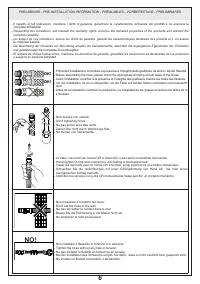
4 PRELIMINARI - PRE-INSTALLATION INFORMATION - PRÉALABLES - VORBEREITUNG - PRELIMINARES Prima dell’installazione e messa in Funzione attenzione! I tubi d’alimentazione devono essere sciacquati con cura prima dell’installazione del mi- scelatore, in modo che non rimangano trucioli, residui di saldat...
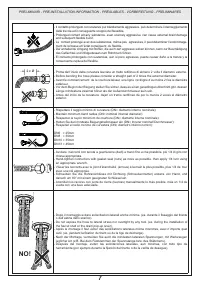
6 PRELIMINARI - PRE-INSTALLATION INFORMATION - PRÉALABLES - VORBEREITUNG - PRELIMINARES - Prima dell’installazione controllare la presenza e l’integrità delle graffature da ambo i lati dei flessibili. - Before assembling the hose, please check the appropriate crimping of both sides of the hoses. - A...
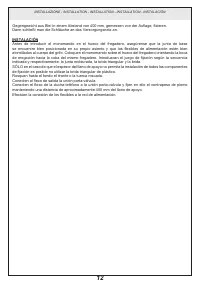
12 INSTALLAZIONE - INSTALLATION - INSTALLATION - INSTALLATION - INSTALACIÓN Gegengewicht aus Blei in einem Abstand von 400 mm, gemessen von der Auflage, fixieren. Dann schließt man die Schläuche an das Versorgungsnetz an. instalación Antes de introducir el monomando en el hueco del fregadero, asegúre...